Posts

Showing posts from March 20, 2016

How To Recover Grub After Installing Windows | Ubuntu / Kali / Debian Linux

Image
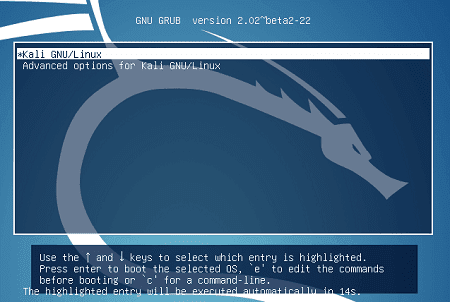
ADs How To Recover Grub (Kali Linux Boot Menu Entry) After Installing Windows  For this you need: 1. Ubuntu (or Any linux) Live CD / USB 2. Eyes to read and Fingers to Type some commands  Step 1. Boot from the Ubuntu / Kali / Fedora (any linux) live disk OR USB Step 2. After the 'Live CD Desktop' loads up, Find Terminal. Step 3. After the Terminal comes up. Type the following commands: #sudo mount /dev/sda10 /mnt  #Note that here for me the root ( / ) of my Kali Linux was on device '/dev/sda10'. For you this would be different and you should check this out under 'Disk Manager' in your Live CD. You are looking for the partition number of your main partition #for i in /sys /proc /run /dev; do sudo mount --bind "$i" "/mnt$i"; done #sudo chroot /mnt #update-grub #grub-install /dev/sda #update-grub Step 5. That's it. Exit the Terminal and reboot. You should now see Grub restored. This is

Hacking Any Windows Operating System Login Password.

Image
Hello Everyone today i will be showing how easy it can be to break into someone's computer system without any professional programming knowledge you don't happen to be a pro no problem. Warning this is for tutorial purpose only do not try anything stupid this is completely illegal this is just to use if forgot the password of your own PC. Now let's just start: Requirements: A flash drive of minimum capacity 8 GB. Now follow these steps: You need to make a bootable pen drive of any operating system above Windows 7 for steps on how to do it please follow steps provided in this tutorial. The second step is pretty simple you have to boot from the bootable Flash drive which we have learned in previous post on hot to make a Bootable Flash driv e Using CMD . Now the real fun begins. Boot from the bootable flash created in previous step. Select the language to install, time and currency format, keyboard layout and press Next. Now on the next

Creating A Bootable Flash Drive Using CMD.

Image
Hey you there how are you. Let me show you today a simple trick to create bootable USB Drive using just CMD yes you read it right "CMD" no internet connection no prob. just follow my steps. So first of what you would be needing. 1. A flash drive of Minimum 8 GB Capacity. (Because we all know day by day the size of operating systems are getting bigger and bigger in size.) 2. and of course some basic knowledge about computer. So just insert your pen drive and follow the steps. 1. press "Windows Button + R" type in "cmd" tick the check box to give admin permission and press enter. 2.Command Prompt will open up and then type in the commands one by one. diskpart.exe list disk select disk * Note:In Place of star there will be number (eg. 1,2,3,4....) according to the USB devise no shown in the list after typing the command "list disk" after the successful selection of the disk continue with the below commands. clean c

Utilizing The Complete Bandwidth of Your Internet Connection.

Image
Hello every one Today i will show you how you can utilize the reserved bandwidth in any Windows Operating System. So Simply follow My Steps. First of all what are the things you would be needing. 1. A Windows Machine. 2. Some basic Knowledge. That's all. Now the steps. 1. Press the "Windows key+ R" on your keyboard. 2. A dialog box like below will appear then type in "gpedit.msc" and press enter. 3. A new Window Will open up. 4. Then Go To Computer Configuration>Administrative Templates>Network>QoS Packet Scheduler. 5. As you can see in the pic and on your screen there is a option called "Limit Reservable Bandwith" double click it. 6. A new window will open up and there will be some options you will see that the limit reservable bandwidth set to "Not Configured/Disabled". 7. Set it to "Enabled" as soon you do that you will see the bandwidth limit will automatically reach to "80%"

Install Linux On Android.

Image
Kali Linux on any Android Phone or Tablet Getting Kali Linux to run on ARM hardware has been a major goal for us since day one. So far, we’ve built  native  images for the Samsung Chromebook, Odroid U2, Raspberry Pi, RK3306, Galaxy Note 10.1, CuBox, Efika MX, and BeagleBone Black to name a few. This however does not mean you cannot install Kali Linux in a chroot on almost any modern device that runs Android. In fact, the developers of Linux Deploy  have made it extremely easy to get any number of Linux distributions installed in a chroot environment using a simple GUI builder. Prerequisites A device running Android 2.1 and above, rooted. At least 5 GB free space on internal or external storage. A fast, wireless internet connection. Patience to wait for a distribution to bootstrap from the network. Configuring Linux Deploy for Kali There’s actually very little to be done to get Kali installed. By choosing  Kali Linux  in the “ Distribution ” tab, you’ve pretty much c

ISO of DOOM Kali Linux

Image
Some else can also be using this image. In our last blog post, we provided an example of running an  unattended network installation of Kali Linux . Our scenario covered the installation of a custom Kali configuration which contained select tools required for a remote vulnerability assessment using OpenVAS and the Metasploit Framework. With just a few minor changes to this concept, we can further leverage Kali to create other cool and shiny toys as well. In today’s post, we’ll see what it takes to create what we fondly refer to as “The Kali Linux ISO of Doom”. The idea we had was to build an “unattended self-deploying” instance of Kali Linux that would install itself on a target machine along with a customized configuration requiring no user input whatsoever. On reboot after the installation completes, Kali would automagically connect back to the attacker using a reverse OpenVPN connection. The VPN setup would then allow the attacker to bridge the remote and local networks a

Nuke Encrypted Kali Installation.

Image
There’s been a  fair amount of discussion  around the recently introduced  LUKS nuke patch  we added to the cryptsetup package in Kali Linux. We wanted to take this opportunity to better explain this feature, as well as demonstrate some useful approaches which are worthwhile getting to know. LUKS Nuke in a Nutshell As explained well By Michael Lee in his  ZDNet article , when creating an encrypted LUKS container, a master key is generated at random. A passphrase is then used to encrypt the master key in turn. This process means that the passphrase is not directly coupled to the data. That is, if two sets of identical data are encrypted and the same passphrase used, the master keys remain unique to each set and cannot be swapped out. What this also means however, is that regardless of the passphrase used, if the master key is lost, recovering data is impossible. This process conveniently lends itself to being used as a nuke by deliberately wiping the keys. Example Use Case of